Could we felt a vest from our raw wool?
…Katharina asked me.
Yes, of course, no problem. This is how it was created:
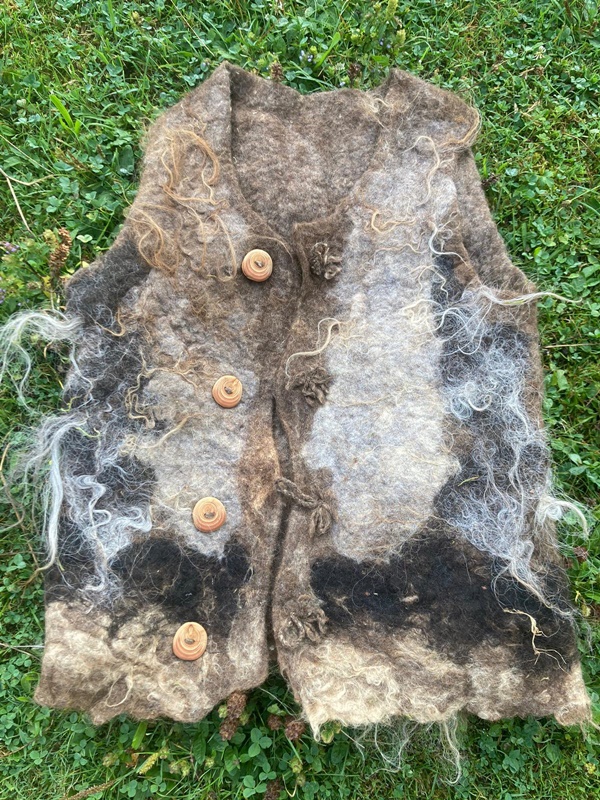
What do you need to simply felt a vest?
1.Wool for felting
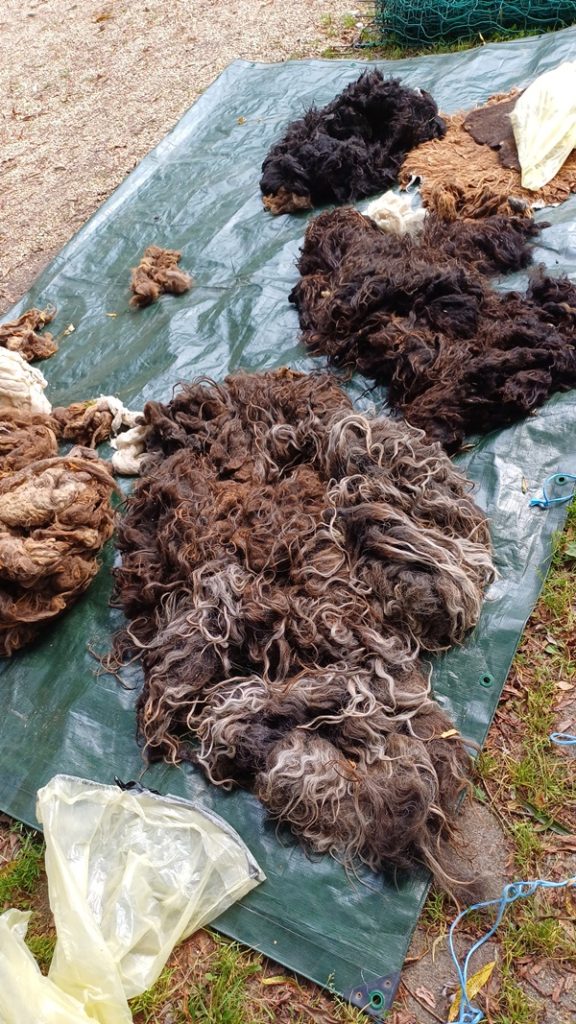
In this case, it is raw wool from Quessant sheep of different colors. Mostly raw wool, because some of it had already been washed once and tamed a little with a small carding machine. We used this carded wool as a base. It still contained plenty of lanolin, you could feel it.
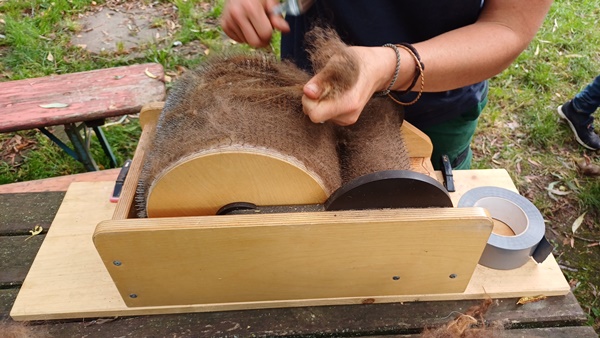
Here you can already see how to clean the simple, hand-operated carding machine. You should also remove the last fibers hanging in it after you have removed the wool if you do not want to process similar wool again.
2. The shrinkage test
If you want to make felt clothing that fits you, you can’t avoid the question of how much the wool you want to use will shrink.
So we first felted a felt sample to find out the shrinkage factor and we also wanted to find out how the different curls would look felted in.
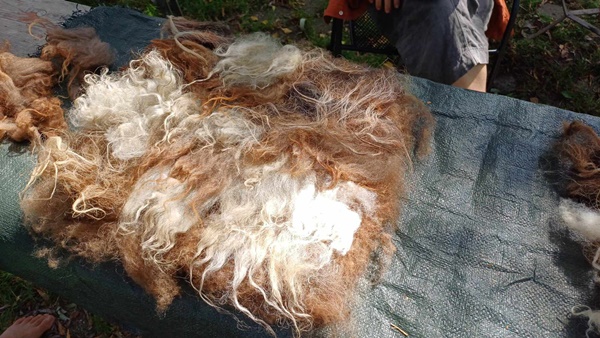
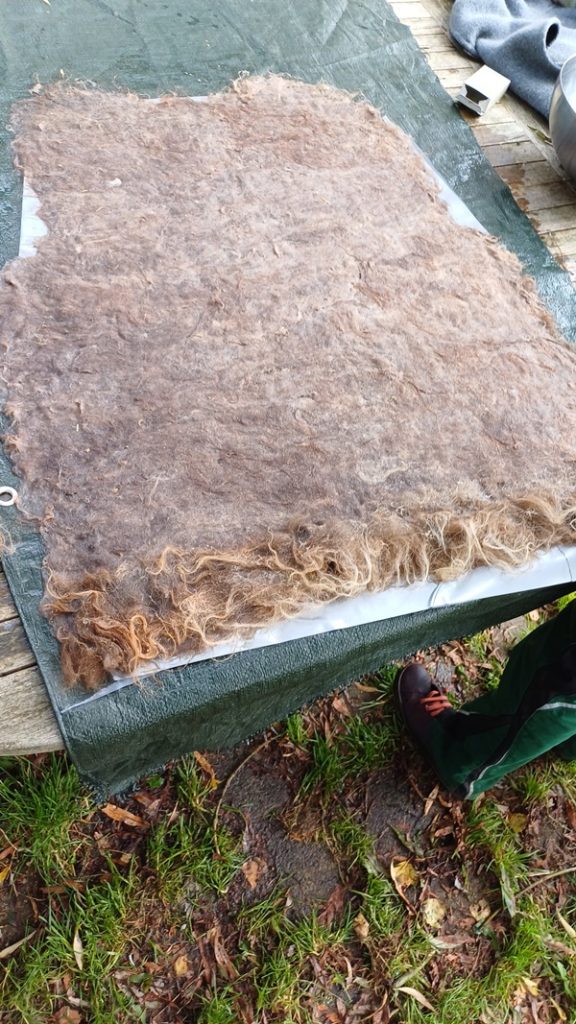
So we laid out the carded wool on an area of 30×30 cm, decorated it with the raw wool curls and finished felting it, i.e. it should not be a hard board, but a dense felt.
We then worked out how many percent the wool would shrink, because that’s how much bigger the layout has to be to achieve the desired final size.
3. The Resist
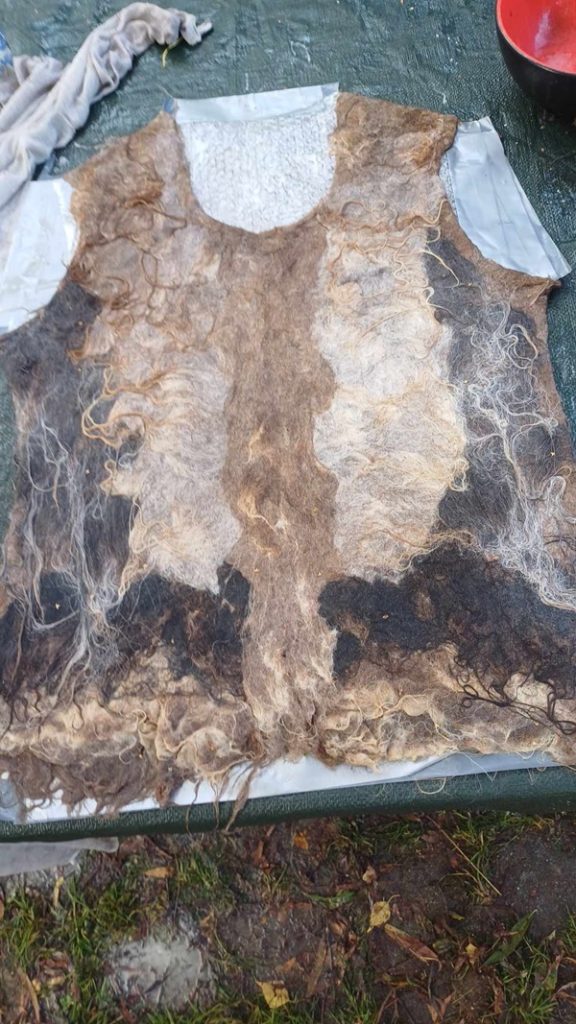
As we didn’t want to sew the felt vest but felt it in one piece, we needed a resist that we could felt around to create the hollow felt.
We wanted a rather robust vest that could be worn over two sweaters when riding, for example, and that would still keep the back warm.
For the resist, we used bubble wrap left over from a package. The template was very simple:
1. We took an existing vest as a pattern, laid it flat on a large sheet of paper and drew the outlines on the paper.
2. Then we enlarged the outline from a point using the shrinkage factor: You draw lines by connecting the center point to the most important points on the outline and extending these lines from the center point and shrinking accordingly, making these points the new outline. All you have to do is connect them.
3. It is best to extend the template along the openings such as the neck, arms and bottom edge. We didn’t want to cut the felt there afterwards, but have the organically coming out edges.
4. Laying out the pattern
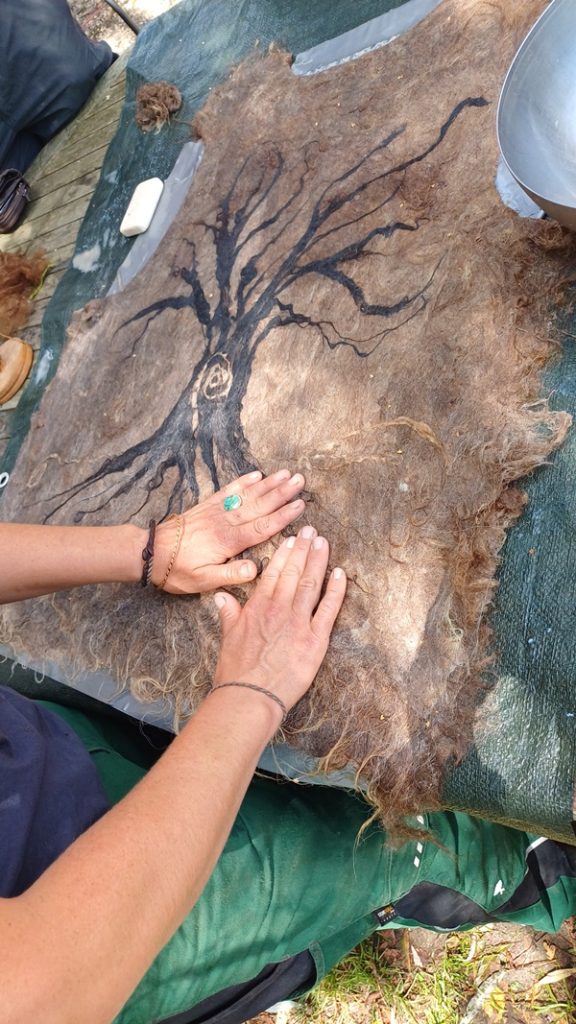
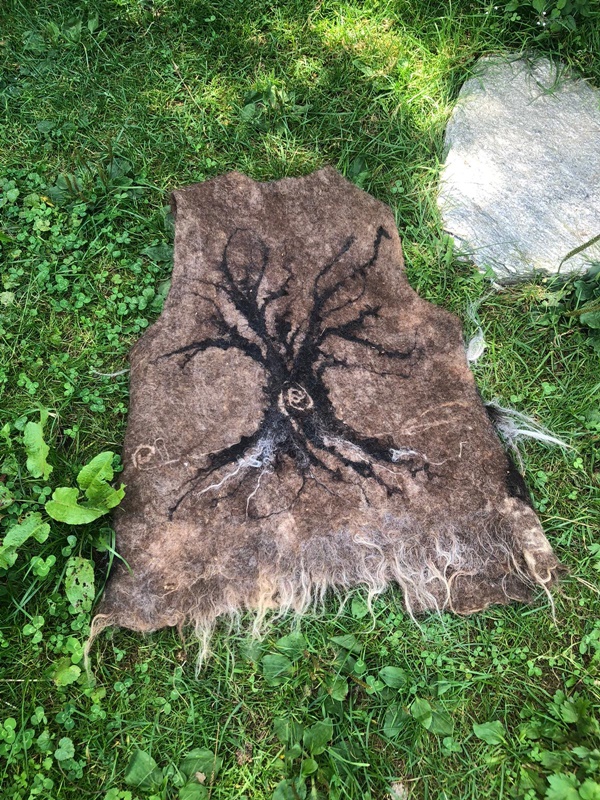
Katharina wanted to felt a tree on her back. The black raw wool was perfect for this.
The best way to do this is to first pull the curls and strands through soapy water, squeeze out all the air and place the wet fibers on the already “de-aerated”, soapy, wet wool base. This allows you to practically draw with the fibers.
She has also applied yarn she has spun herself, also from the same sheep, of course.
5. Don't forget after felting...
… to rinse the soap thoroughly and pull everything into shape.
Who is this felt vest actually designed for?
The hand-felted vest that grows with you...or rather: you grow into the great wool yourself...
For Frieda, “Daughter of Mother Nature”, who is only 8 years old now. She should be able to wear the vest for many years to come, of course it is longer for her now and the armhole is bigger, but it is already perfectly suitable for putting on cold days and for keeping her waist warm when riding.
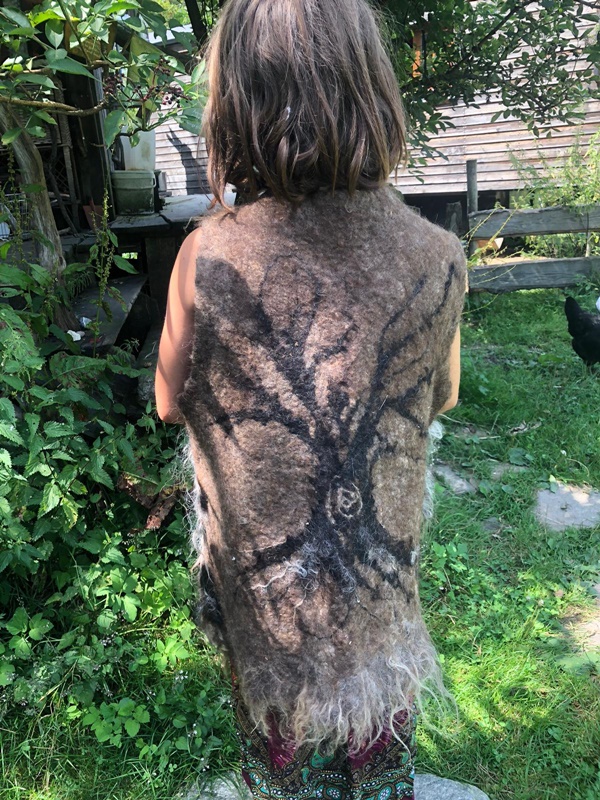

The brown wool is from Frieda’s favorite sheep: Lilly. She should therefore have a vest made mainly from Lilly wool and the other sheep decorate the surface further.
6. Beautiful details as the finishing touch
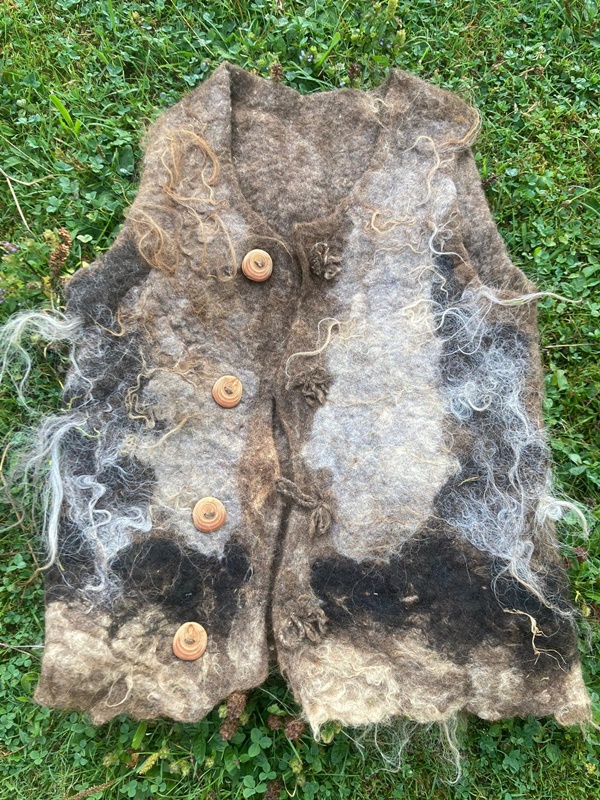
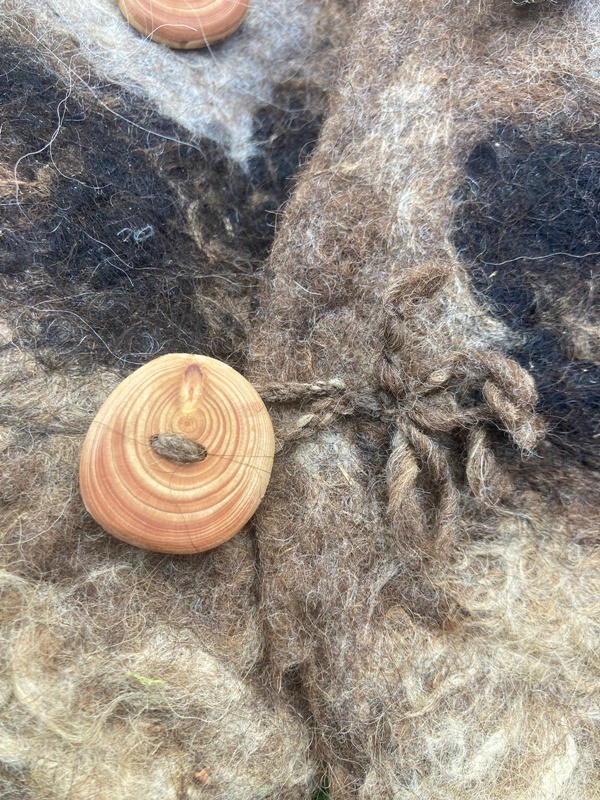
For fun, the opening was not cut straight, but wavy. (The cut edges were patiently felted so that they would not fray later and the layers of wool would not open). Of course, you can’t sew in a zipper this way, but you can use much nicer wooden buttons, which you may have carved yourself, as fasteners and use yarn you have spun yourself from the same wool as a loop.
I'd love to read about your raw wool felting experiences if...
you have some, then leave a comment so I can react.
If you are new to this topic, I’ll show you how to felt your own fur cushions, rugs, wall felts, cat beds…from raw wool in this videocourse . Visit me ON DEMAND and you’ll be able
– how to felt mono- and mosaic cushions,
– how to felt long-curly and flat-curly cushions,
– how to give a rectangular or round shape to your fur-felt,
– how you can work with holey and how with even fleeces,
– which different backings you can create while felting.. .🙂



2 thoughts on “Felting a vest from raw wool”
Bonjour Corinna,
Feutrer de la laine brute, c’est ce que je préfère: être immergé par tous les sens dans la laine, cela me fait voyager et me permet de lâcher prise. J’en fait des luminaire et des tentures. C’est magique car au fur et à mesure de feutrage la laine se lave et sa vraie couleurs apparaît.
J’aime beaucoup tes felting camps. J’aimerai participer au prochain comme professionnel.
I did one a while back, using British wool . We did it exactly the same way!! I used black Gotland curls for the body, and white long Wensleydale curly locks along the edges. It was lovely and warm, but a bit scratchy. I still have it after many years of wear.